Node.js on a Raspberry Pi
A bell cannot tell time, but it can be moved in just such a way as to say twelve o’clock – similarly, a man cannot calculate infinite numbers, but he can be moved in just such a way as to say pi. Hello Pi!
First thing that came to my mind when I learned about Raspberry Pi, was to find out a way to get my hands on it. I was slightly disappointed that it wasn't yet available in India. I could not be sure if RaspberryPi would ship it from UK. I did not have to wait for too long though, I soon found it listed available on Kits 'n Spares/Element14. Without any hesitation I placed the order (prepaid) and waited for my pi to come to me. To my frustration I received an email from them saying, 'Your ordered item is not in stock and the lead time for the same is 8-9 weeks, please confirm for the order'. While it still showed 6 qty available on their website. How frustrating!
Agitated with their attitude I wanted to cancel the order and demand a refund, but there was no place else I could go. I will skip other mail exchanges with their customer support, as it is of less relevance now. A courier guy knocked on my door with well packed brand new Raspberry Pi, what some 45 days after I had placed. This is the tight slap on face of e-commerce in India. While we believe e-commerce is the way forward, some pieces still don't fall in place to encourage it enough.
As explained well in Raspberry PI's getting started document, I downloaded Raspbian image onto an SD card, hooked up a USB mouse, keyboard, connected it a monitor using HDMI-to-VGA cable and switched it on. To my utter despair, nothing would happen! I see the red light blink a few times, yet nothing on the display screen. I did not know what else to do. All my excitement nose-dived to a complete loss of hope. I tried reloading the Raspbian image a few times, hooked up wires all over again, but to no avail. Largely disappointed.
Had I received a faulty piece? Already frustrated with the support I had received from Element14, I did not want to go back to them. I quietly packed everything back into the black box and kept it aside. My desire to experiment with the pi had prematurely ended!
More than a year after all this, I almost had forgotten about the pi. A lot of things have changed since then. I have relocated to my current residence, still paying my rents. Bunu has started taking her baby steps, and speak a few words out of this world. I have switched over from the old thinkpad to a shiny macbook air. My romance with node.js has grown stronger than ever. One fine weekend, pi happened!
I took the black box out from the self loaded a fresh Raspbian image (December 2013 build) onto a new SD card, wired up and switched it on. I used a HDMI-to-DVI cable to connect to the monitor. To my pleasant surprise, the pi did come to life this time! Wow! I was never so excited to see an OS boot up! Once Raspbian got installed, I updated a few settings using raspi-config tool and rebooted. Pi came back to life promptly enough! I already knew by then the night had just begun!
This article hasn't qualified yet as a technical article. So I will talk less in sentences and more in terms of code here on.
Let's setup networking first, without which my pi won't quite be a pi. I had purchased wi-pi usb adapter for wireless. I tried the pre installed wifi-config tool to configure wifi but it did not seem to connect to the wireless network. I trusted my instincts and thought console is way to go forward. I then fired up the terminal and started hacking my way.
Lets configure wlan interface first, fire up nano editor to edit /etc/wpa_supplicant/wpa_supplicant.conf
ctrl_interface=DIR=/var/run/wpa_supplicant GROUP=netdev
update_config=1

# You can customize these values as per your network settings. Refer to WLAN setup to check these values
# If you find any difficulties, configure using the wifi-config gui tool, it works just fine

network={
        # your WLAN interface name (SSID)
        ssid="Pretty Fly For Wifi"
        # the password to connect to your WLAN
        psk="*****"
        # RSN for WPA2-PSK, WPA for WPA-PSK
        proto=RSN
        # key management scheme, WPA-PSK for both WPA-PSK and WPA2-PSK
        key_mgmt=WPA-PSK
        pairwise=CCMP
        auth_alg=OPEN
}
Next, we will configure the wlan0 interface, fire up nano to edit /etc/network/interfaces
auto lo

iface lo inet loopback
iface eth0 inet dhcp

# configure wlan0 interface
allow-hotplug wlan0
iface wlan0 inet manual
wpa-roam /etc/wpa_supplicant/wpa_supplicant.conf
iface default inet static

# we will assign a static IP to the pi
# use IP in same series as assigned by dhcp
# adjust netmask, network and gateway accordingly
address 192.168.1.98
netmask 255.255.255.0
network 192.168.1.0
gateway 192.168.1.1
Hit sudo reboot and keep your fingers crossed. I had already disconnected monitor and keyboard from the pi, and waited for wi-pi to start blinking. And it just did as expected. I had enabled ssh access from the raspi-config tool, so I brought up a terminal on my mac and fired up ssh pi@192.168.1.98. After a few seconds, my pi responded back prompting for password to login and I was all set. Box one ticked. You should next add your public ssh key as an authorized key for the pi user so that you don't have enter password every time.
I wanted to be able to run my blog first up. I have written my blog in node.js, use markdown for writing up articles. I make use of libgit2 to serve production requests, magickwand to process images, imguri to generate data-uri images and upstart to manage node services. I set nginx up to proxy my node server.
I use git for version control and for deployments. My blog code is hosted (private repository) on bitbucket. I have adapted the blog engine code from n8.io.
Lets start with setting up all the tools on the pi server.
# Update the pre-installed packages first
sudo apt-get update
sudo apt-get upgrade

# install upstart and reboot, don't worry it will be ok
sudo apt-get install upstart
sudo reboot

# install node.js on Raspberry Pi in less than 5 minutes
# Find latest linux-arm-pi release from http://nodejs.org/dist
wget http://nodejs.org/dist/v0.10.22/node-v0.10.22-linux-arm-pi.tar.gz
tar -xvzf node-v0.10.22-linux-arm-pi.tar.gz
sudo mv node-v0.10.22-linux-arm-pi /usr/local/node
sudo ln -sf /usr/local/node/bin/node /usr/local/bin/node
sudo ln -sf /usr/local/node/bin/npm /usr/local/bin/npm

# check node install
node --version

# Install pre-requisites
# git comes pre-installed. cool :)
sudo apt-get install libmagickwand-dev nginx redis-server

# I use a script to install libgit2 0.17.0
sudo apt-get install cmake zlib1g-dev libssl-dev
mkdir -p tmp && cd tmp
git clone git://github.com/libgit2/libgit2.git && cd libgit2
# we have unmet dependencies with newer versions, hence v0.17.0
git checkout v0.17.0
# build and install libgit2
# instructions from http://libgit2.github.com/#install
mkdir build && cd build
cmake .. && cmake --build . && sudo cmake --build . --target install
# clean up
cd ../../../ && rm -rf tmp/libgit2/
We have installed all pre-requisite packages, we then checkout my blog repository, run a few more scripts to set node service. set up nginx to proxy requests. I will skip the details as it is not so relevant here. Setting up nginx to proxy your node server is fairly straight forward.
Box two ticked. My node.js server is up and running and I am over joyed! You would want to get to the rooftop and scream so loud that the whole world knows about your feat! Well, you could do so, but not quite needed, there's a subtle way to do so. Take your pi to high speed lane of internet and make it a netizen. Thats the box number three. Most important one, and again it starts to fall apart, but for an Eureka moment.
Your pi would need a permanent address first up, I am using fibre optic broadband service from Spectranet. Good speeds, good connectivity, hassle free operations. They didn't pay me to say this, but good work often attracts applause. When I inquired them about getting a static IP, some broadband service issue one to you upon request, I was even ready to pay, but they blatantly refused. No static IP for home users. What stupid reasoning!
What do we do now? This is not an uncommon situation to be in, that's why you have tons of dynamic DNS solution available. Easy as it sounds, they require you to update them your dhcp assigned IP and they would keep their services running to re-route your guests back to your updated address. Out of many excellent, easy to setup Dynamic DNS solutions, I picked up DuckDNS, created my account in a snap, and configured vm.duckdns.org to point to my dhcp assigned IP address. They also provide install notes to setup a cron job to update their servers about your IP address changes.
# Update domains with actual values, pick token from your duckdns account, you can leave ip empty
echo url="https://www.duckdns.org/update?domains=exampledomain&token=******************&ip=" | curl -k -o /home/pi/duckdns/duck.log -K - >> duck.sh
chmod +x duck.sh

# Setup cron to publish your IP updates
crontab -e
# add the following lines, runs the duck.sh script every 30 minutes
*/30 * * * * /home/pi/duckdns/duck.sh

# save crontab and restart cron
sudo service cron start
So far so good! Moment to realize the truth, fire up http://vm.duckdns.org/ in a browser. The wheel spins, you would expect the blog page to load. When you're about to tick the third box, the wheel stops, rather just dies, "Oops! Google Chrome could not connect to vm.duckdns.org, Did you mean: duckdns.org?" No!
Next several attempts to fix things ends futile. Its almost morning and busy day at work waits, so go to bed, not feeling too good about the whole incident. Next day again I'm back to hack my way to get it work. Nothing seems to help, I have had conversation with tech support from Spectranet, but they are so dumb, I wonder how they call it tech support. I have tried all sorts of port forwarding option on the router's admin page. I conclude this is being controlled from my ISP, and they are blocking all incoming requests, as the IP assigned to me is not unique but a shared IP. But then I discovered they allowed me to expose my router's admin page on port 8080. I turn the option on, and hit the external IP on port 8080. Bingo! it shows my router's settings page. I had found my way out. Not perfect but it worked.
I switched off exposing my router's web server and configure the NAT interface to forward requests on port 8080 to my pi on port 80. I have configured nginx on port 80 on the pi eagerly waiting for any incoming, proxying it in turn to my node server. I head to where else but twitter to announce my Eureka moment, while I waited watching the server logs. And soon enough, we had incoming! Thanks to twitter-verse and my friends on facebook.
Box three ticked!
Since I could not get hold of a static IP, home of this blog stays in cloud at vnykmshr.com, while pi continues to run from my home, serving a copy of the blog at this address: http://pi.vnykmshr.com/. I am not using the duckdns url here, this is possible because you can set up nginx to use duckdns upstream instead.
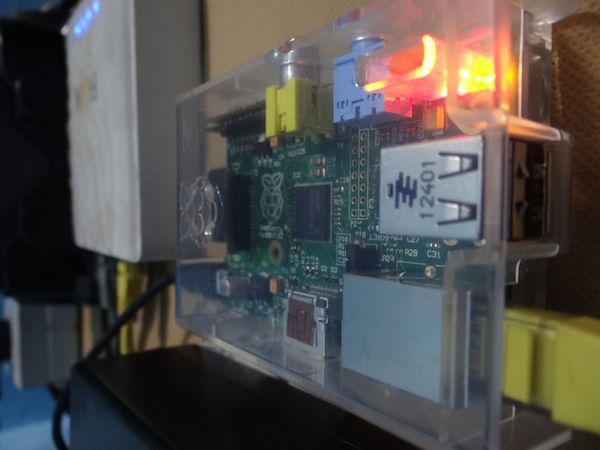
Here's my pi in action, blinking wi-pi is gone and I have wired it up for better connectivity.
I am exploring more ways to experiment with the pi, will come with more updates if I stumble across anything interesting.
\m/